Welcome to the fourth part of this HTML5 Flappy Bird tutorial series. In the previous post we implemented endless scrolling of our game’s ground layer. Today we’ll do the same for the pipes that our little hero must fly between.
What you will learn…
- We’ll continue writing JavaScript directly within Adobe Animate CC
- Some of the fundamentals of the CreateJS suite of JavaScript libraries
- How to implement endless scrolling within your game world
What you will need…
- A basic understanding of at least one programming language, such as JavaScript or ActionScript
In part three we wrote a Ground class that handles the scrolling of the game’s ground layer, and a Main class that acts as the game’s top-level entry point. Today we’ll take what we learned from scrolling the ground layer and write a new class that scrolls the game’s pipes. We’ll also hook our new class up to Main.
Before we start coding, it may be useful to remind yourself how the pipes look and behave within the final version of the Flappy Bird clone. Before proceeding, spend a few moments with the game: www.yeahbutisitflash.com/projects/flappy-animatecc/flappy.html.
Getting Started
You’ll need Adobe Animate CC. A trial version can be downloaded from www.adobe.com/products/animate.html. You’ll also need the FLA file you were working with in part three.
Now let’s get to work!
The Pipes Class
Launch Adobe Animate CC and open your FLA file.
Create a new timeline layer directly above the Ground class layer. Name the layer Pipes class and click on the first frame on its timeline. Open the Actions panel by selecting Window | Actions (F9) from the dropdown menu. Within the Actions panel, click on the Current frame tab and then click the Pin Script button to create a Pipes class tab. Okay, let’s write some JavaScript.
Our Pipes class will have a similar structure to the Ground class. It will have a constructor, two methods to start and stop scrolling, and an update method.
Add the following JavaScript to the Actions panel:
function Pipes()
{
  this.scrolling = false;
}

Pipes.prototype.startScrolling = function()
{
  this.scrolling = true;
}

Pipes.prototype.stopScrolling = function()
{
  this.scrolling = false;
}

Pipes.prototype.update = function()
{
  if (this.scrolling == true)
  {
    console.log("Pipes::update() scrolling");
  }
}
Our class won’t do much at the moment – it’ll simply write some text to the console when scrolling is taking place – but we’ll work on that soon enough. First let’s go ahead and wire it up to the Main class.
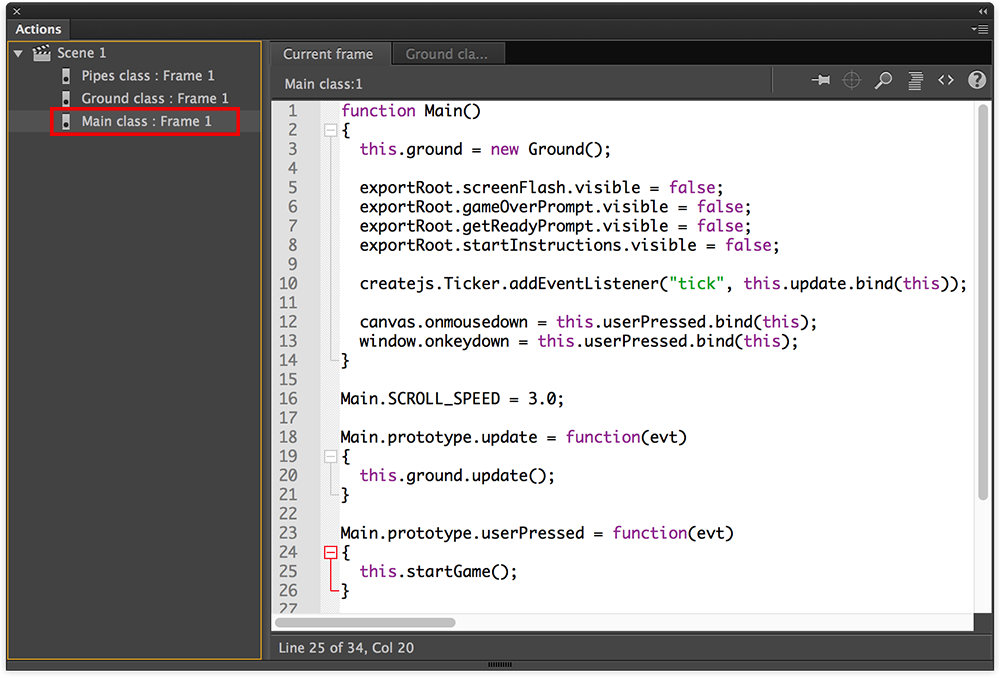
Figure 1. Selecting the Main class from the Script navigator.
As usual, we’ll open the Main class within the Actions panel. You can move to the Main class by selecting it from the Script Navigator, which is on the Action panel’s left-hand side. Within the navigator list you will see your Pipes, Ground, and Main classes. Click on the Main class and it will appear within the Script pane (Figure 1). Also, feel free to pin the class to the Actions panel.
Within your Main class, declare a member variable that holds an instance of our Pipes class:
function Main()
{
  this.ground = new Ground();
  this.pipes = new Pipes();

  exportRoot.screenFlash.visible = false;
  exportRoot.gameOverPrompt.visible = false;
  exportRoot.getReadyPrompt.visible = false;
  exportRoot.startInstructions.visible = false;

  canvas.onmousedown = this.userPressed.bind(this);
  window.onkeydown = this.userPressed.bind(this);

  createjs.Ticker.addEventListener("tick", this.update.bind(this));
}
Now ensure the pipes instance gets updated within the Main class’ update() method. Add the following line:
Main.prototype.update = function(evt)
{
  this.ground.update();
  this.pipes.update();
}
Finally, initiate scrolling of the pipes within the startGame() method:
Main.prototype.startGame = function()
{
  this.ground.startScrolling();
  this.pipes.startScrolling();
}
Let’s check that everything is working. Save your changes then test within the browser by selecting Control | Test Movie | In Browser (Cmd-Enter | Ctrl-Enter) from Animate CC’s dropdown menu. Click on the game’s viewport to initiate scrolling. Not only will the ground layer scroll across the screen but you should also see the following text being output to the JavaScript console:
> Pipes::update() scrolling
If you can see this then the Pipes class is working as expected and we can start fleshing it out.
Working with the Pipe Movie-Clips
Okay, now we can start thinking about using the actual pipe movie-clips sitting on the stage. As a quick reminder, take a look at the stage. If you unlock the Pipes layer on the timeline, you’ll find three pipes named pipe0, pipe1, and pipe2 respectively. The placement of these pipes on the stage is actually quite important.
The first pipe sits just outside the left of the stage, the second is positioned directly in the centre of the stage, and the third is just outside the stage’s right-hand side. The horizontal distance between the pipes is intentional: it’s the exact distance we want between every pipe that our little flappy bird will fly through.
Also, notice that each of the pipes has a different y-position. Again there’s a reason for this. Remember, as the user plays the game, each new pipe that appears will have a random y-position. However we do need to apply some constraints to these y-positions during play otherwise we run the risk of having gaps in some pipes that are impossible to reach. The pipe on the far-left has been used to indicate the highest vertical position that any of the pipes can be placed at during play. The pipe on the far-right has been used to indicate the lowest vertical position that any pipe can be placed at during play.
This means that if we wish to increase the distance between the pipes or the variation in y-positioning of each pipe then it’s simply a matter of changing things visually within the stage rather than having to find and alter any code.
Obtaining the Distance Between Pipes
Of course, our Pipes class needs to be able to determine these values by interrogating the stage when it’s first instantiated. Let’s add some code to do that. We’ll start by obtaining the distance between the pipes – we’ll deal with the vertical positioning in a moment. Add the following line to your class’ constructor:
function Pipes()
{
  this.scrolling = false;

  this.distanceBetweenPipes = exportRoot.pipe1.x - exportRoot.pipe0.x;
}
Calculating the distance is a simple case of subtracting the first pipe’s x-position from the second’s. We’ve stored that value within a member variable named distanceBetweenPipes allowing us to access it throughout the class.
Obtaining the Left Bounds
In order to manage the scrolling of the pipes we’ll need to know when a pipe has scrolled off the screen. We can use the pipe’s width to calculate the x-position it will be at once it has fully scrolled off the screen:
function Pipes()
{
  this.scrolling = false;

  this.distanceBetweenPipes = exportRoot.pipe1.x - exportRoot.pipe0.x;
  this.leftBound = -exportRoot.pipe0.nominalBounds.width;
}
nominalBounds property returns the bounding rectangle for a movie-clip’s first frame. From that we retrieved the width of our pipe. The bounding rectangle that is returned represents the author-time dimensions and therefore does not reflect any changes made to the movie-clip at runtime. Since we don’t apply any changes in scale to our pipes at runtime, this is fine, and we can safely obtain the width knowing that it will be correct.Obtaining the Minimum and Maximum Vertical Positions
Now let’s store the minimum and maximum vertical positions that our pipes can be at. Declare the following two member variables:
function Pipes()
{
  this.scrolling = false;

  this.distanceBetweenPipes = exportRoot.pipe1.x - exportRoot.pipe0.x;
  this.leftBound = -exportRoot.pipe0.nominalBounds.width;

  this.maxPipeY = exportRoot.pipe0.y;
  this.minPipeY = exportRoot.pipe2.y;
}
Referencing All Three Pipes
And since we’ll be scrolling all three pipes across the screen, we’ll store each within an array that we can easily access:
function Pipes()
{
  this.scrolling = false;

  this.distanceBetweenPipes = exportRoot.pipe1.x - exportRoot.pipe0.x;
  this.leftBound = -exportRoot.pipe0.nominalBounds.width;

  this.maxPipeY = exportRoot.pipe0.y;
  this.minPipeY = exportRoot.pipe2.y;

  this.pipes = [exportRoot.pipe0, exportRoot.pipe1, exportRoot.pipe2];
}
As with the ground slices, the order the pipes are stored within the array is important. The left-most pipe should be at the front of the array, while the right-most pipe should be at the back.
Scrolling the Pipes
We’re now in a position to write the code to actually scroll the pipes, which is almost identical to the code we wrote for the ground slices.
Within our update() method we’ll call two methods: updatePipePositions() and checkLeftPipeIsOutsideScreen(). Add the following two lines and also remove the log() statement that’s there:
Pipes.prototype.update = function() { if (this.scrolling == true) {console.log("Pipes::update() scrolling");this.updatePipePositions(); this.checkLeftPipeIsOutsideScreen(); } }
Now add the following two methods to the class:
Pipes.prototype.updatePipePositions = function()
{
  for (var i = 0; i < this.pipes.length; i++)
  {
    var pipe = this.pipes[i];
    pipe.x -= Main.SCROLL_SPEED;
  }
}

Pipes.prototype.checkLeftPipeIsOutsideScreen = function()
{
  var leftMostPipe = this.pipes[0];
  var rightMostPipe = this.pipes[2];
  if (leftMostPipe.x < this.leftBound)
  {
    leftMostPipe.x = rightMostPipe.x + this.distanceBetweenPipes;
    this.pipes.shift();
    this.pipes.push(leftMostPipe);
  }
}
Save your changes and republish the project. Test everything in a browser. You should now see the pipes scrolling along with the ground. When each pipe moves outside the left-hand side of the screen, a new one will appear from the right. This is the exact same behaviour as the slices that make up our ground layer.
Random Vertical Positions
At the moment the vertical position of each pipe doesn’t change. However, when each new pipe appears from the right we want to set a random y-position for it to make the game more challenging. Let’s go ahead and write some code to randomly set the y-position of each new pipe.
Add the following method at the end of your class:
Pipes.prototype.setRandomYPosition = function(pipe)
{
  var delta = this.minPipeY - this.maxPipeY;
  pipe.y = this.maxPipeY + Math.round(Math.random() * delta);
}
The method above takes a pipe as a parameter and randomly sets its y-position somewhere between the minimum and maximum vertical positions that were set within the constructor.
Now that we’ve defined this method let’s actually use it. Make a call to setRandomYPosition() from within your checkLeftPipeIsOutsideScreen() method and pass the pipe that has just moved off the screen to it:
Pipes.prototype.checkLeftPipeIsOutsideScreen = function()
{
  var leftMostPipe = this.pipes[0];
  var rightMostPipe = this.pipes[2];
  if (leftMostPipe.x < this.leftBound)
  {
    leftMostPipe.x = rightMostPipe.x + this.distanceBetweenPipes;
    this.setRandomYPosition(leftMostPipe);
    this.pipes.shift();
    this.pipes.push(leftMostPipe);
  }
}
The above change sets a random y-position to the pipe immediately after it’s re-positioned outside the screen’s right-hand side.
Let’s try our latest changes in the browser. Save everything and republish. After clicking the screen you should see that each new pipe that enters the screen now has a random y-position.
The Pipes Starting Position
We’re almost done with the Pipes class for the time being. However you may have noticed that our game currently begins with a pipe already on the screen. This is going to make things quite tricky for the player so let’s write some code to reposition all three pipes outside the right-hand side of the screen to begin with. We’ll also set an initial random y-position for each of the three pipes. And since we’ll need to reset the position of the pipes each time a new game is started, let’s also declare our array of pipe references within our new method too rather than doing it only once within the constructor.
Add the following method at the end of your class:
Pipes.prototype.setupStartPosition = function()
{
  this.pipes = [exportRoot.pipe0, exportRoot.pipe1, exportRoot.pipe2];

  for (var i = 0; i < this.pipes.length; i++)
  {
    var pipe = this.pipes[i];
    pipe.x = (lib.properties.width * 1.5) + (i * this.distanceBetweenPipes);
    this.setRandomYPosition(pipe);
  }
}
It’s fairly straightforward. We use a for-loop to walk through our array of pipes. Within that loop we set the x-position and apply a random y-position to each pipe. Both the stage width and the distance between pipes is used when calculating each pipe’s initial x-position. This will ensure that each pipe sits outside the screen’s right-hand side when the game begins, and also ensure they have the correct gap between them. We actually use one and a half times the stage width to make an even larger gap between the bird and the first pipes. This will give the player just a little more breathing space when they start each new game.
lib variable, which contains an object named properties. This object contains a number of properties used to describe your stage including width, height, fps, and color.With the setupStartPosition() in place, call it from your constructor and also remove the declaration for the pipes member variable since it’s now handled within setupStartPosition():
function Pipes() { this.scrolling = false; this.distanceBetweenPipes = exportRoot.pipe1.x - exportRoot.pipe0.x; this.leftBound = -exportRoot.pipe0.nominalBounds.width; this.maxPipeY = exportRoot.pipe0.y; this.minPipeY = exportRoot.pipe2.y;this.pipes = [exportRoot.pipe0, exportRoot.pipe1, exportRoot.pipe2];this.setupStartPosition(); }
Save and republish. Now when you run the game from the browser you’ll notice that there is no longer a pipe sitting on the stage. When you click, the first pipe will now scroll in from outside the screen and also have a random y-position. This is exactly what we want!
Summary
That’s us finished with the scrolling of the ground layer and the pipes. We’ve seen how easy it is to write JavaScript that interacts with the stage’s contents to create an endless scrolling effect.
Next time we’ll simulate physics within our game world and get our little hero flapping. See you then.
Christopher Caleb

Christopher Caleb is a freelance developer and published author. His body of work spans a wide range of projects that encompass casual games, interactive kiosks, social networks, and mobile applications. Christopher’s expertise covers both native and cross-platform technologies, with a focus on optimisation within hardware constraints. He specialises in delivering highly engaging experiences with usability being a primary concern.
He blogs at www.yeahbutisitflash.com and tweets as @chriscaleb.